How to Post ERA Files?
Posting payments using ERAs or Electronic Remittance Advice is an automated process. In order to view ERAs, follow the above mentioned workflow and get to “Pending” page.
User can filter claims in terms of the plans listed below:
- All
- Primary
- Secondary
- Tertiary
All shows all the ERAs coming from all insurances.
Primary shows all the ERAs coming from primary insurances.
Secondary shows all the ERAs coming from secondary insurances.
Tertiary shows all the ERAs from the third insurance that a patient might have.
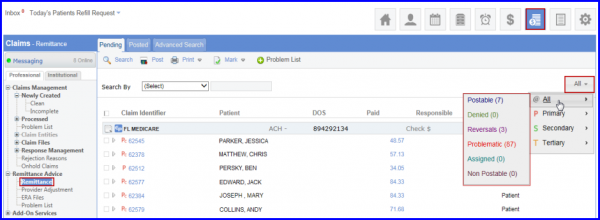
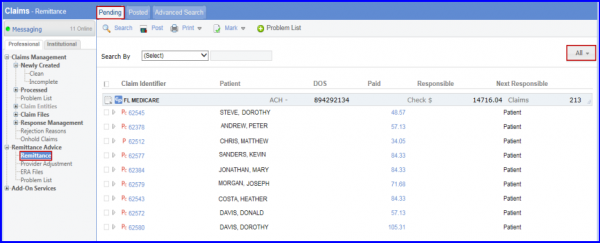
By default the application lands on to Pending tab and All filter is selected . This tab displays all the ERAs that are yet to be posted.
Other options available under Remittance Advice menu are:
Problem List option displays all ERAs which cannot be automatically processed by the system. This may be due to a data mismatch or simply because the amounts in the ERA are unbalanced. Hovering mouse over each ERA record displays the reason for the record being moved to the Problem List.
Provider Adjustment displays all the provider adjustments that are received. These can be over payments, under payments, incentives payments or deductions due to penalties but all of them apply to the provider as opposed to a specific appointment.
ERA Files option is only enabled for administrative users and displays all ERA files which have been received by the practice.
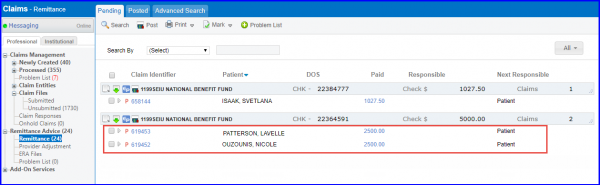
The ERAs are structured as follows:
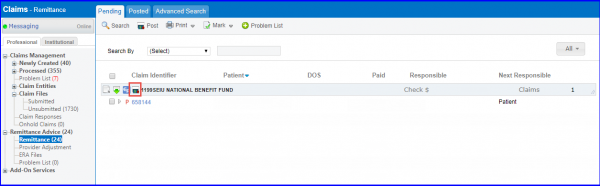
Each ERA row makes a section displaying name of the payer and the check number. Hovering mouse over a row shows the Payer ID, Check amount and Check date.
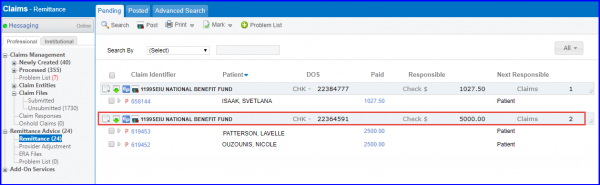
All the rows below are the individual appointments that are being paid under this check. Each appointment row is made up of the Claim Identifier, Patient Name, Paid Amount, Current Responsible Plan, Next Responsible Plan and the Date of Service.
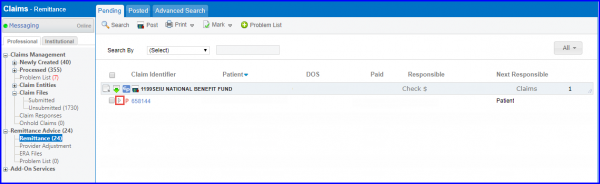
Clicking on the Claim Identifier takes user to a full page view of the selected appointment.

Clicking on the paid amount brings the financial history screen for that appointment in the application – here, user can review the current status of the appointment prior to posting of ERA.
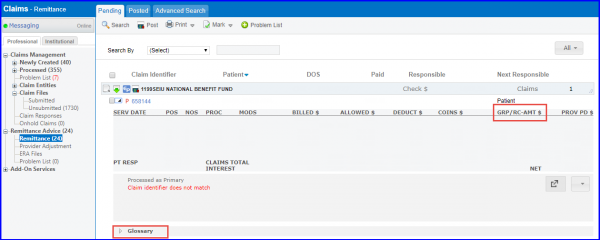
In order to view the procedure level details for each appointment simply click on the ![]() (expand) icon on the left of the Claim Identifier.
(expand) icon on the left of the Claim Identifier.
In this expanded view, all individual procedures and the amount that is billed can be found, adjusted and paid for each. Clicking on the amount in the GRP/RC-AMT column enables user to view the specific adjustment details.

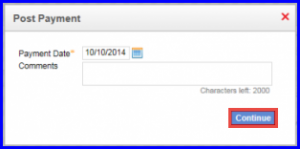
In order to post an ERA, check the box to the left of the Claim Identifier and click on Post Payments.
A window appears allowing user to choose the payment date and add a comment which appear on the payments page for each appointment. Click on the Continue button to post the ERA to the respective appointment. Also, the ERA record is moved from the “Pending” tab to the “Posted” tab.
ERAs for denials can also be posted using the same workflow. All denied ERAs appear under the “Denied” tab. User can select these records and click on the ‘Post Payment’ button to record these denials in their respective appointments.
User can post an ERA completely rather than selecting all records under that ERA one by one to post payment for an ERA.
In order to use this feature, the user simply clicks on “Post ERA” button against the desired ERA.