How to Use the Pre-Auth Module?
The following sections and functionalities have been added in the Pre-Auth Module:
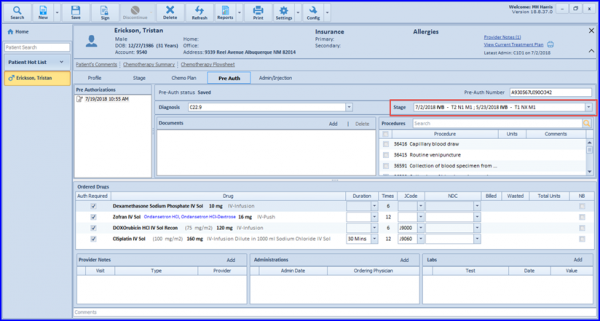
1) Document Pre-Auth number in a Pre-Auth request
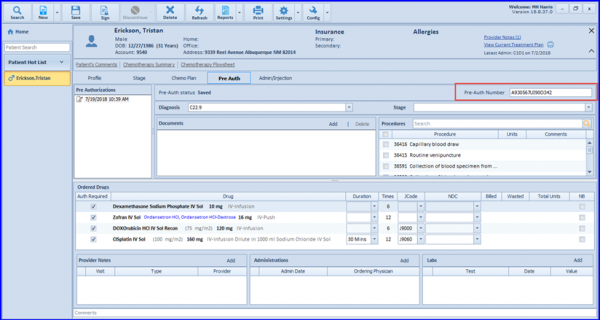
The user will navigate to the “Pre-Auth” screen. The pre-auth number can be documented in the field “Pre-Auth number”.
2) Associate diagnoses with a Pre-Auth request
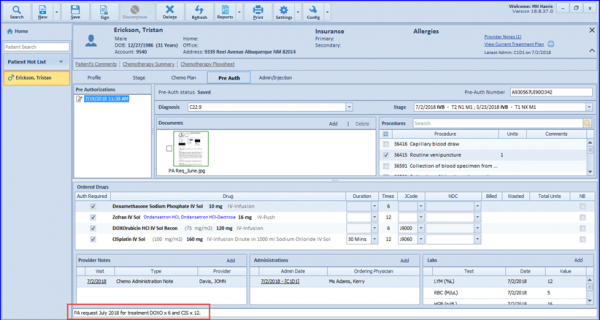
The user will navigate to the “Pre-Auth” screen. The diagnoses present in the patient’s profile will load by default when a pre-auth request is created.

3) Associate cancer stage with a Pre-Auth request
The user will navigate to the “Pre-Auth” screen. The stages documented with the selected patient will populate in the “Stage” field.
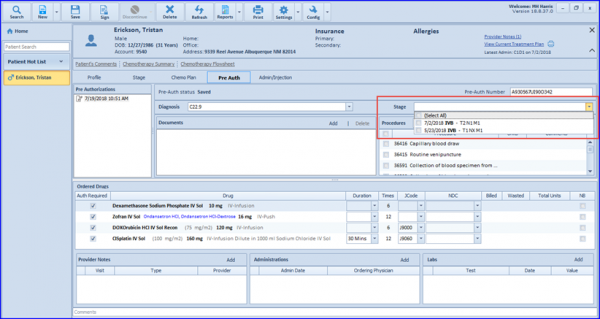
User can select the desired stages which would become a part of the pre-auth request.
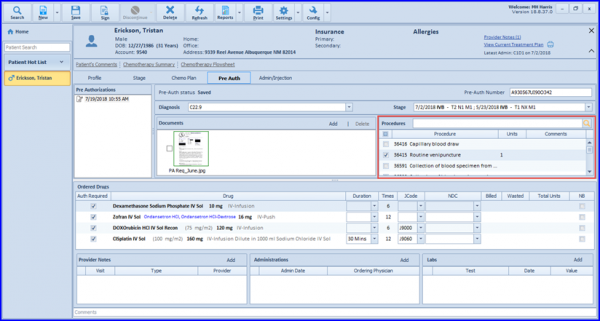
4) Attach document in a Pre-auth request
The user will navigate to the “Pre-Auth” screen. In order to associate documents with the pre-auth request, the user will have to press the “Add” button in the “Documents” section which would display the list of documents added in the “Document Manager” of that patient.
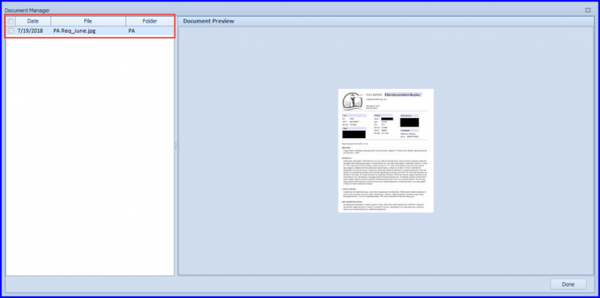
The user will have to select the desired document(s) and then press the “Done” button to associate these document(s) with the pre-auth request.

5) Associate procedures with a Pre-Auth request
The user will go the “Pre-Auth” screen. By default, the list of configured procedures will be populated in the “Procedures” section. The user can either select the desired procedure(s) from the list or can search for other procedure(s) in the “Search” field. Upon selection, 1 unit will be selected for that procedure.
6) Updates in the “Ordered Drugs” section
The “Chemo Rx Order” section has been renamed as “Ordered Drugs”. The updated screen can be seen below:
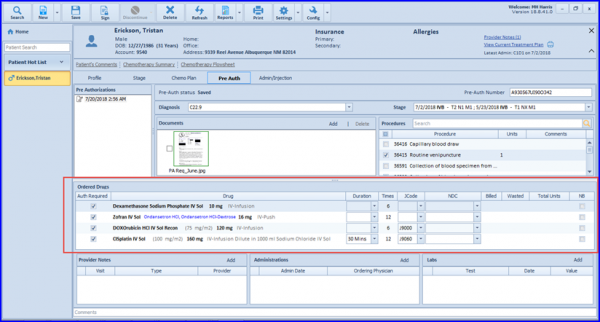
- “Auth Required” checkbox has been added to specify whether pre-authorization of that specific drug is required or not.
- The “Drug” column will contain the information of drug including its name, unit dose, total dose, route, mixing instructions etc.
- The infusion time of the drug will be populated in the “Duration” field.
- Available billing codes of the drug will be seen in the “JCode” field.
- “NDC” field has been added to document the NDC as well. Based on the total dose and the selected NDC, the “Billed” and “Wasted” units will be calculated which would thereby calculate the “Total Units”.
- “NB” option has been added to mark a drug as non-billable.
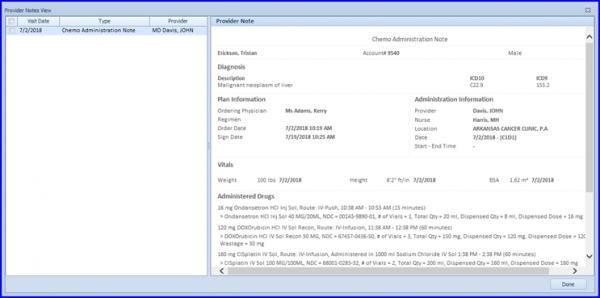
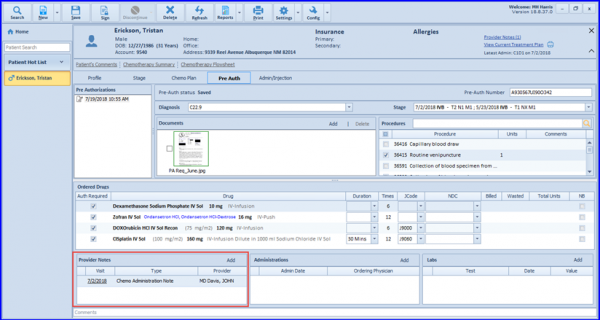
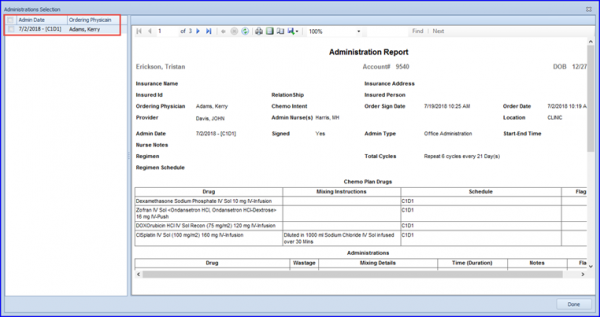
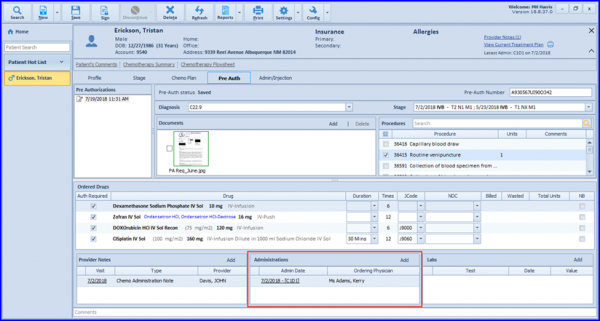
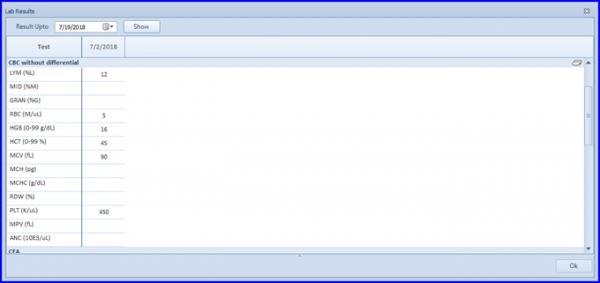
7) Attach provider notes in a Pre-auth request The user will navigate to the “Pre-Auth” screen. In order to associate provider notes with the pre-auth request, the user will have to press the “Add” button in the “Provider Notes” section which would display the list of the available provider notes of that patient. The user will have to select the desired provider note(s) and then press the “Done” button to associate these provider note(s) with the pre-auth request. 8) Associate administrations with a Pre-Auth request The user will navigate to the “Pre-Auth” screen. In order to associate administrations with the pre-auth request, the user will have to press the “Add” button in the “Administrations” section which would display the list of the signed administrations of that patient. The user will have to select the desired administration(s) and then press the “Done” button to associate these administration(s) with the pre-auth request. 9) Associate lab results with a Pre-Auth request The user will go the “Pre-Auth” screen. In order to associate lab results with the pre-auth request, the user will have to press the “Add” button in the “Labs” section which would display the available lab results for that patient. The user will have to select the desired lab result(s) and then press the “OK” button to associate these lab result(s) with the pre-auth request. 10) Add comments in a Pre-Auth request The user will go the “Pre-Auth” screen. The user can write any comments in the “Comments” section. 11) Updates in the Pre-Auth reports criteria screen and Pre-Auth reports The Pre-Auth report criteria screen has been updated. User can learn about these updates by clicking here.